Dans le cadre du projet BI sur lequel je travaille actuellement, j’avais besoin de restituer mes données sur une carte de plusieurs pays or sur visual studio, on trouve que la carte des États-Unis, alors comment faire pour les autres pays?
Voici une solution pour créer notre propre carte personnalisée.
Obtenir le shapefile
Pour commencer, Il faut télécharger le fichier shapefile (world) qui contient toute les informations liées à la géométrie des pays (Points, lignes, Polygones).
Conversion du shapefile à SQL Spatial Data
Dans la prochaine étape on va utiliser un outil appelé Shape2SQL (sqlspatialtools_build3759) pour extraire les données spatiales du shapefile dans une table SQL Server.
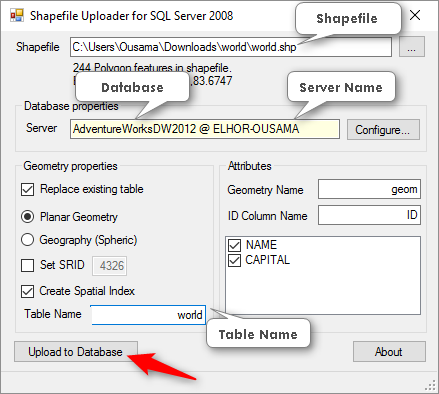
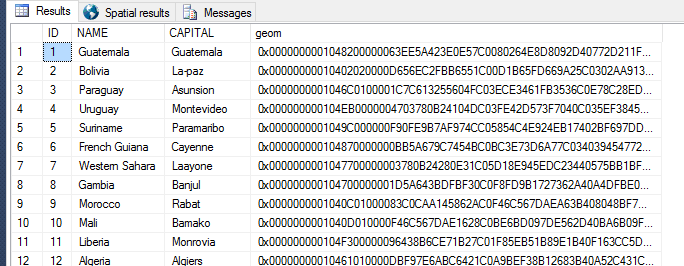
Maintenant, j’ai tous les pays dans un tableau appelé World, comme indiquée ci-dessous, avec une colonne de geom ayant le type de données SQL Géométrie, sachant qu’on peut supprimer les pays dont on n’a pas besoin de cette table.
Création de la carte
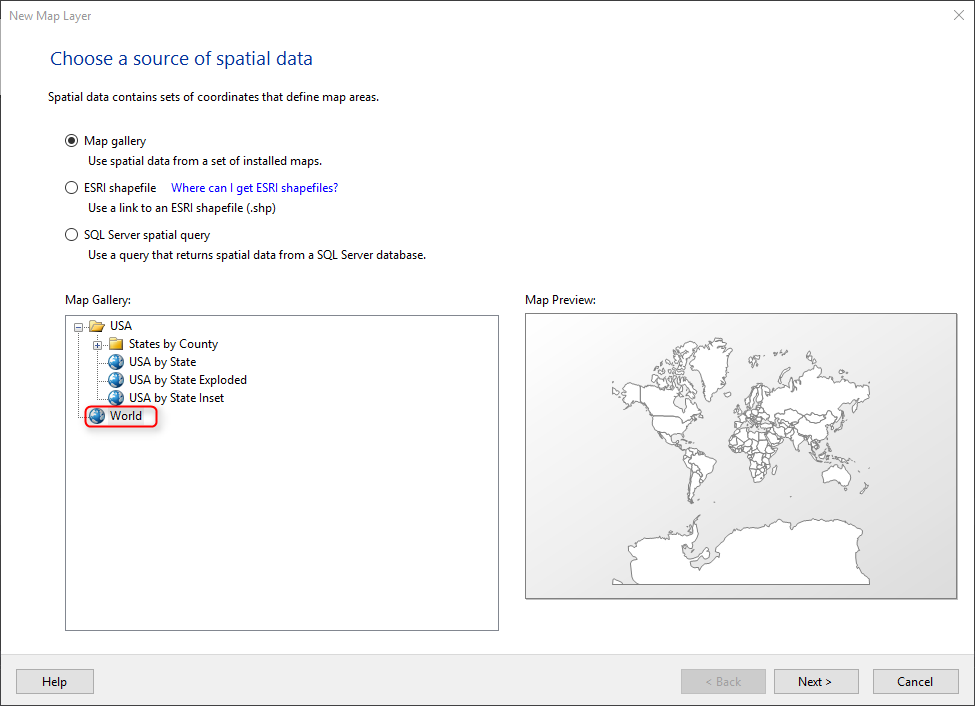
Maintenant que j’ai mes données spatiales dans une table, je suis prêt à créer la carte. Dans Business Intelligence Development Studio, j’ai ajouté la carte à mon rapport qui a lancé l’Assistant Carte et puis j’ai utilisé les étapes suivantes sur la page :
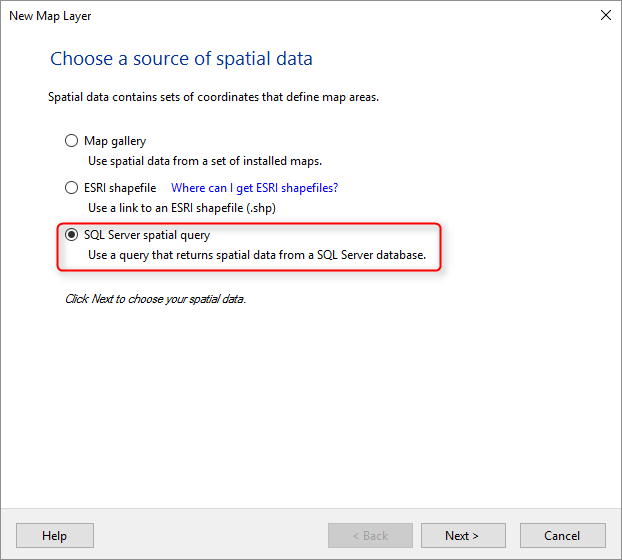
- Choisir une source pour les données spatiales
- Sélectionnez requête spatiale SQL Server
- Cliquez sur Suivant.
Sur la page :
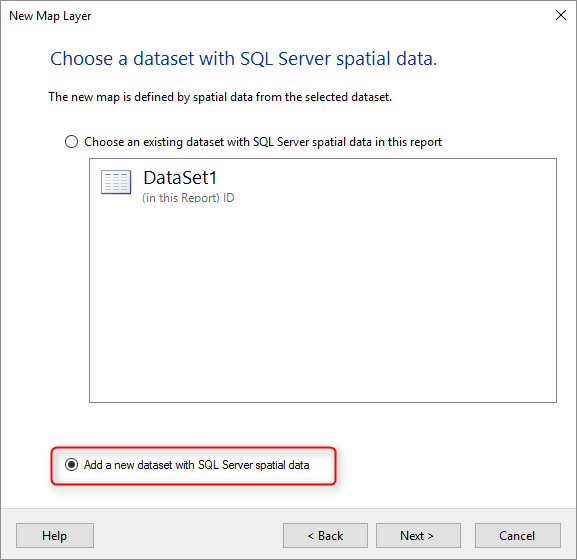
- Choisir un jeu de données avec les données spatiales SQL Server
- Sélectionnez Ajouter un nouveau jeu de données avec des données spatiales SQL Server.
Sur la page :
- Choisir une connexion à une source de données spatiales SQL Server
- Sélectionnez Nouveau.
Dans la boîte de dialogue Propriétés de la Source de donnée, sur la page Général :
- Ajouter une chaîne de connexion comme celui-ci
(en changeant le nom de votre serveur et de votre base de données):
Data Source = (local); Initial Catalog = SpatialData
Cliquez sur OK et puis cliquez sur Suivant.
Sur la page conception d’une requête, ajoutez une requête pour la table « dbo.World », comme ceci :
SELECT[NAME] ,[geom] FROM[dbo].[world]
Ensuite cliquez sur suivant.
L’assistant de carte lit les données spatiales et le rend pour vous sur la page Choisir les données spatiales et les options de vue cartographique, comme indiqué ci-dessous.
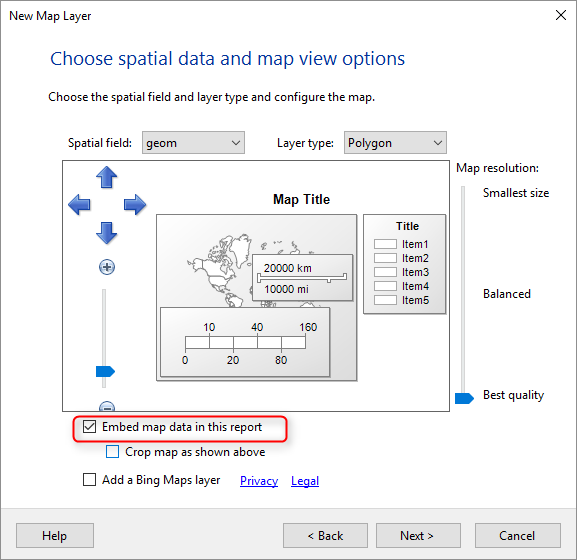
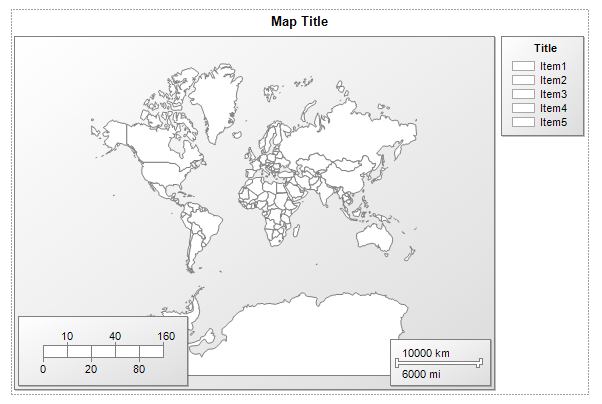
Dans l’écran suivant, rappelez-vous de cocher la case à cocher l’option Embed Map Data in this Report Après cela, continuer à cliquer sur suivant jusqu’à ce que vous atteigniez le bouton Terminer.Cliquez sur Terminer et vous devriez obtenir le résultat comme indiqué ci-dessous :
Maintenant, sauvegardez le rapport, puis copier le rapport rdl à partir de son emplacement source vers C:\Program Files (x86)\Microsoft Visual Studio 11.0\Common7\IDE\PrivateAssemblies\MapGallery , vous devriez être en mesure de voir la carte que vous venez de créer dans la galerie de la carte lorsque vous créez une nouvelle carte dans un autre rapport sur le même système.
Ce fichier .rdl qui a été créé peut-être partagée et utilisée sur d’autres projets.
Leave a comment